This pattern i have been using for about two seasons, and it works very well. this pattern i tied for the fly fishing and fly tying magazine. for the saltwater section, and they commented on the pattern. say it was tied to a high standard, and that with this fly on your line. you would feel very confident in catching a fish,
The hook is a size 4 carp hook.
Above, what the magazine flyfishing and flytying, sent me.
Tie in the thread, i am using Danville 140 denier white.
Now tie in some squirrel tail hair, for the feelers.
Trim off the unwanted hair, and run thread up hook to eye.
Now i will tie in two long feelers, using Amhurst tail dyed orange.
Above, i have tied in the two long feelers.
Now i tie in some 6lb b/s clear mono, this is for the rib.
Now i tie in some flash as feelers,
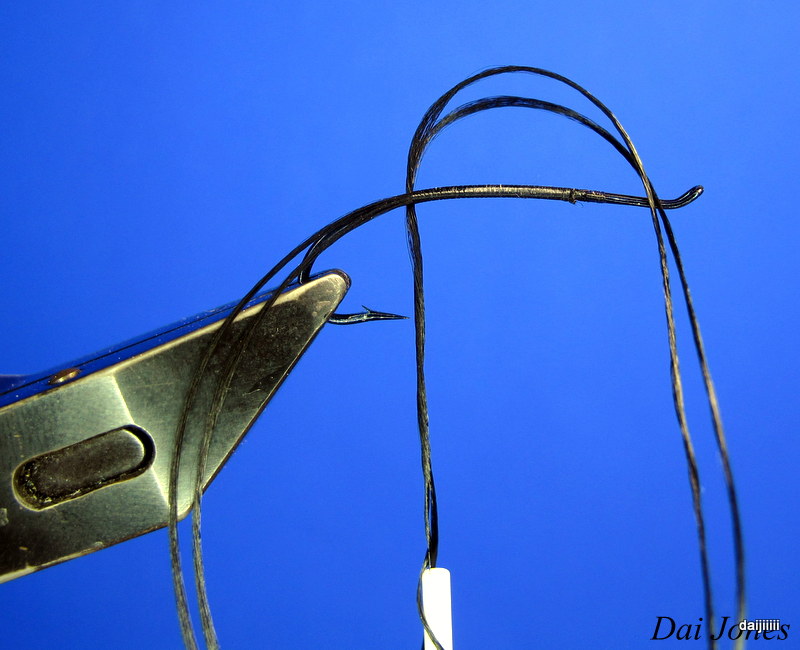
Now its time to make the eyes for the shrimp, i use 20lb b/s clear mono. burn the end with lighter to stop a small black bead falling off,
Now above, you can see that i have coated the bead with Deercreek UV resin. it locks it in place and forms a nice round black eye,
Now we tie in the eyes,
Above i have wrapped the mono on body, and bring the tying thread back to the shrimps eyes.
Now it's time for the shrimps legs, i use a grizzly feather natural.
Now measure up the length of fibers, that you want for the legs. not i have tied in the feather upside down, or set it concave so when you wind the feather on. the fibers will face forward,
Above the feather is wound on,
Now i have trimmed the feather on top, and cleaned up the tie.
Now it's time to tie in the shell back, i have used Veniards shell back light green.
Now you pull the shell back forward, to the front of shrimp. and now you use the 6lb clear mono to rib around body,
Above, i have tied off the rib, and cleaned up the tie.
Now above, i have coated the shell back, again with Deercreek UV resin. and showing top of shrimp,
And above, side view of finished shrimp. i have tied this pattern from size 10 to size 2, and have caught sewin / bass/ flounders / grayling / trout and hooked one salmon which came off before landing.
The GP shrimp, i tied for a competition with the flyfishing and flytying magazine, in the Salmon and sea trout section. and above is a certificate they sent me about the tie, saying a was also a great modern look on on a spey fly.
Right here is a step by step, of my Golden Pheasant shrimp spey fly. this is a great pattern for sewin and salmon, and i have used in salt water and caught bass and flounders on it.
The hook in vise, here i am tying on a Alex Jackson size 5. the thread is black Danville 70 denier,
Now i catch in black floss for the body,
And when wind the thread down the shank, tie in oval tinsel for rib.
Above, a orange dyed Golden pheasant skin, showing the back rump feathers. that i will be using for the tail,
Above, a rump feather, with the fluffy part of the feather removed.
Now tie in the feather by stem,
Now pull the feather up the shank, to the length you need.
And now i have run the thread up shank, and trimmed the unwanted part of feather.
Now its time to tie in the hackle, here i am using a Golden pheasant large breast feather.
This feather will be tied in by the tip,
Now i have tied in the feather, and run thread down the shank to the eye.
Now i have run the black floss down the shank to the eye, followed by the rib.
Now i have trimmed off the unwanted floss, and tinsel. doubled the feather, and getting ready to wind hackle down the shank.
And above, i have run the hackle down the shank of hook, and you must wind it tight behind the rib.
Now its time to tie in a collar, using a breast feather like the body hackle. but this one is dyed orange,
Now tie it in by the tip,
Above, i have wound the collar, and tied it off.
Above, i have now trimmed off the unwanted stem of feather.
Now above, i have picked two rump feathers, again off a GP pheasant in orange.
Now i have cleaned off the unwanted fluff, of the base of feather. and sized it to the size i want for the shell of fly,
Now i tie them in, one on top of the other.
Above showing fly from top. you can also tie these in tented if you want.
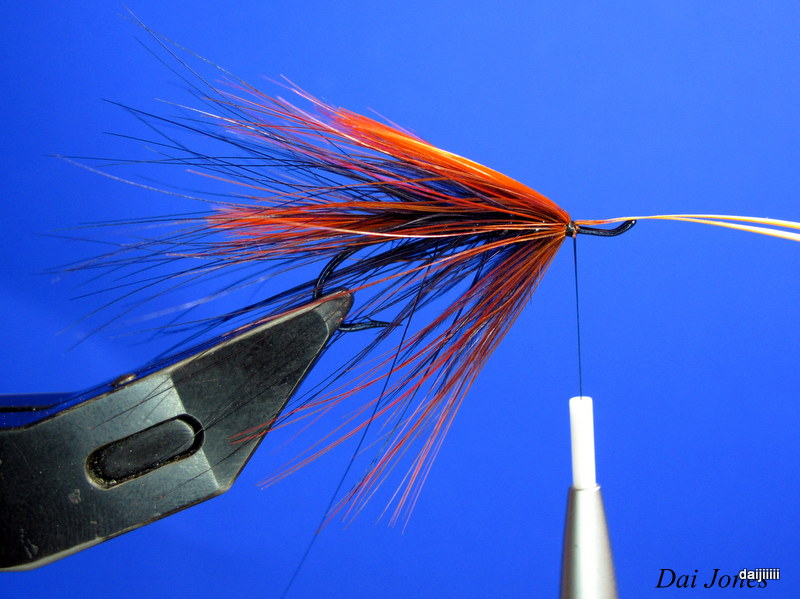
Above showing finished fly from above, and as you can see i have tied in Jungle cock cheeks.
And above, showing side view of fly, i tie this pattern in a number of colors. being Black, black/ orange, all orange, all red and pink. have been the colors that work for me,
Here is a buzzer/ blood worm pattern, which i have made up from the past. to give you fly a bit more movement in the water, Place the hook in vise here i am using a Kamasan B100 size 10.
Catch in you thread on shank of hook, here i am using Danville red 70 denier.
Now catch in some micro Holographic tinsel red, run the thread down to the bend keeping thread flat. by spinning thread bobbin back,
Above, i have run the thread back up hook, again keeping thread flat.
Now, wind the tinsel back up the shank in even turns.
Now i shape the body, were the wing buds will be.
Now its the turn to tie in the flexi floss, to make the shaped wing buds. catch in the flexi floss above the hook eye, leaving about 1" inch.
Now we take the flexi floss, under the hook shank and tie it in above the first tie.
When you are happy with the way the flexi floss is sitting, trim the tying thread.
Now we need to seal in the wing buds, we do this with Deercreek UV resin. which dries in 2/3 seconds under a UV torch, with buzzesr i tend to use a UV laser diode pen torch.
Above you can see that i have sealed the wing buds,
And now above, i have coated the whole blood worm buzzer. and i have used a black permanent marker pen, these feelers stand out a lot in the water. and when drawing it though the water they wave about, and bring the pattern alive. and takes can be very savage,
And above you have the Apps blood worm pattern, which again is very easy to tie. but fishes very well,