Thursday 20 September 2012

Snaketruder, step by step.

 Hi This is a step by step, of my snaketruder. i designed this fly for my sewin fishing, were i wanted a light fly to give a big profile. but light enough to fish in shallow fish holding spots, so looking at Ed Wards intruder gave me the idea. above is the mount that i tie the fly on, it's wire that is used for stringing beads on. and it is nylon coated,  they make different sizes but i like the .024mm dia size, one thing when threading  the wire though the eye of the hook. you have to just strip off a small bit of the nylon coating, then you can push the two ends though the hook eye.
 Now we need to fix the wire into a loop, this is very easy. all you have to do is just lightly heat up the nylon coating, with a low flame on your gas lighter. and it will fuse the wire together, and don't worry it a very strong join. and will not pull apart, i have tried it on a spring balance to 60lb plus and it never broke. so you will do it with a fly rod for sure, above you can see the join.
 Above a close up of the join, and you can make the loop to the size you need the fly to be.
 Abov,e i have put the hook in vise. and on hook the other side of vise. the eye end of fly. this is a snake vise i have made. but you could do it with two vises, or if you have a Norvise will do.
 Here i have caught in the thread, i am using Danville 240 denier white.
 Now we need a dubbing pillow, to hold up the hackle that comes next. the dubbing i am using is the underfur, of a marble fox tail dyed orange,
 Above is the dubbing rope,
 Here i have wound on the dubbing rope, for the hackle pillow.
 Now tie in the rear hackle, here i am using a hot orange whiting saddle hackle.
 Above i have wound on hackle, and tied it off.
 Now i tie in some Ostrich, dyed light orange about six to eight lengths each side.
 Now i add some orange krystal flash,
 Now i make a dubbing loop, to take the next step. here i use Amherst tail dyed orange, 
 Here i have spun the loop, to make a Amherst hackle.
 Here i have wound on the dubbing loop, and cleaned it up.
 Now i need a section of mylar tubing, for the middle of the fly body. note i have opened the end that go's on first,
 Now i have taken the fly out of the vise, pushed on the mylar tight up to the rear hackle.
 Here is a close up of the way, that i have finished the mylar. and coated with Deecreek UV resin, and set with UV torch. and trim off thread which is danville 70 denier hot orange,
 Now it's time to start again, with the front hackles.
 The dubbing rope,is the same as the rear.
 The front hackle, is again tied the same as the rear.
 Front hackle finished,
 Again, Amherst for the front, in dubbing bloop.
 Above, the Amherst is wound on.
 Now i tie in, Orange dyed mallard flank feather.
 And above, the finished fly,k with cone head push on. and a small dab of glue and open up the wire eye.
 And above, two colors.
And above, close up of snaketruder flies. top tied lightly, and bottom tied a little heaver. hope you like the snaketruder and step by step.

Tuesday 11 September 2012

Double hackle piglet, step by step.

 Here i an using a Deercreek gold double hook size 6, catch in the thread Danville hot orange 70 denier.
 Now catch in the oval tinsel, for the tag and rib.
 Here i have tied in the tail, orange bucktail and flash.
 Now i tie in the 4 wild boar bristles,
 Here i have put varnish on body,
 Here i have ribbed the body, and coated with Deercreek UV resin.
 Now tie in the middle hackle,
 Here i have wound on the middle hackle,
 Now we tie in the rib, for the forward body,
 Here i have done the body, with the tying thread and ribbed.
 Now we tie in the front hackle,
 Here i have wound on the front hackle,
 And above, the finished fly with jungle cock cheeks.
 Top view of fly,
Bottom view of fly, great little fly that catches a good few fish.

Wednesday 5 September 2012

UV Resin Buzzer, step by step.

 Here is a step by step, of a type of buzzer i use a lot. an a range of other colors, this is tied on a size 14 grub hook.
Above the UV resin that i use, i like the brush in bottle. but Deercreek do a big range of UV resin, as i find it easy to use, plus the lazer diode pen torch. this sets the resin in  11/2 sec, supper fast with the lazer diode torch. 

 Catch on your thread, here i am using Danville 70 denier white.
 Now catch in some mirage tinsel, this is why i am using white thread as a base. it makes the mirage very bright and nice tag,
Above, the tinsel has been wound on, and tied off.
 Now i have changed thread, to Danville black and tied in a extra fine copper mirage rib.
 Now i have run the rib, up over the black body.
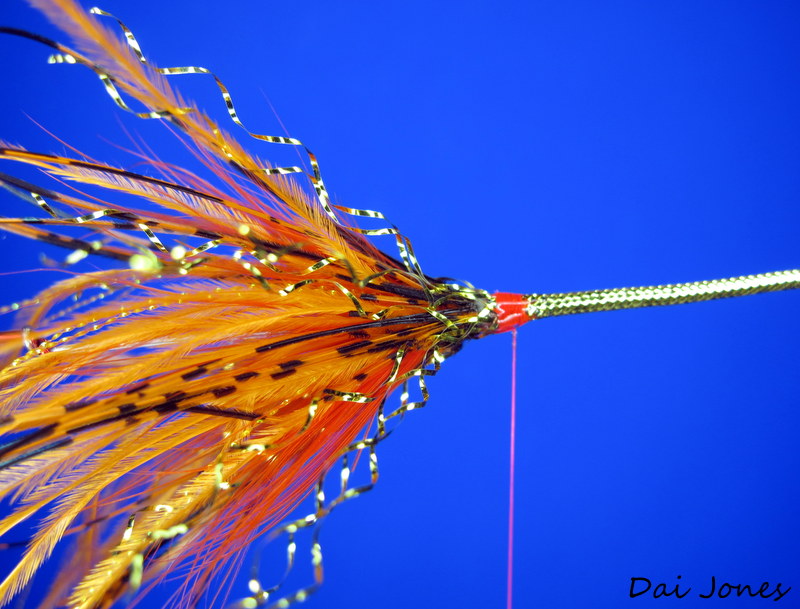
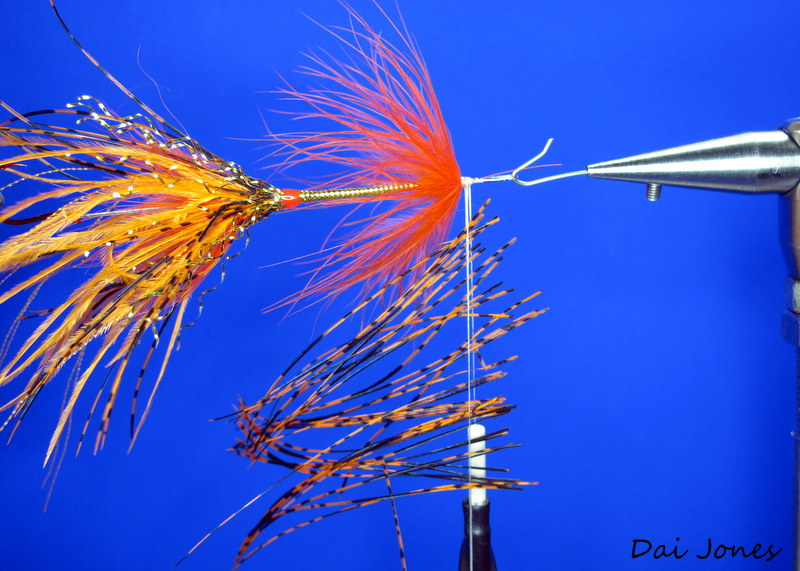
 Now i have trimmed off the rib, run the thread up hook. and tied in the breathing filaments,
 Now just build up the thorax, with the tread.
 Now just tie in your flexy-floss, with one turn of thread.
 Now, take each side of the floss, up over the breathing tubes.
 Now trim off the floss,
 Now a few more turns, to clean up the head. and then trim, now you can see shape of thorax,
 Now i coat with one coat of, Deercreek UV resin. and set with UV torch,

 Above, top view of buzzer.
 And above, is one of my skinny buzzers, no thread just Deer creek UV resin. and i use marker pens to give color, these fish very well and catch a lot of fish.These again can be done in a number of colors,
 Above, Black and gold rib buzzer, with herl thorax.
And to view, i always tied these with Sally-hansan nail varnish. but they would take an age to dry, but these days with the Deercreek UV resin. they take minutes to do.